Get up, stand up. Explore balance. Ground. Improve athletic performance, craftsperson finesse, artistic expression.
A series based on classic Awareness Through Movement® lessons
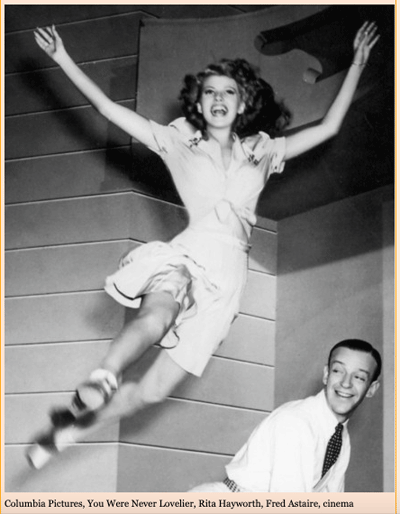
Rita Hayworth and Fred Astaire in a rehearsal for “You’ve Never Been Lovelier”
A third of the entire body’s bones are in the feet. Twenty six bones, 33 joints, and hundreds of nerves, ligaments and tendons. The foot’s physics allow us to stand bipedal; the foot can flatten against the ground AND lock into a rigid formation that propels movement.
Let’s have fun with Awareness Through Movement® lessons for feet. We add the always-available super-tool, the Voice-O-Meter and International Healing Tao healing sounds to help identify and release habitual tensions.
Expect to carry yourself more regally, connect with the ground, find power, grace, confidence and balance in movement. Kick up your feet and relax or dance and swing. Feet are amazing.
Back On Our Feet - 1 - Toes
A variation of “Esalen 27 - The Foot and Its Toes”
Toes!
This lesson is a rediscovery of the wonder of toes. They go up, they go down, they twist, they spread, they curl, they are anatomically connected in structure and occasional use to the fingers. They can help flatten or arch the feet. They express fear and comfort in the way they touch the ground.
This lesson helps soften the front of the foot and reintroduce you to toes you’ve forgotten you have. It connects fingers and toes, hands and feet, in surprising ways. How do you move that middle toe? Bring your beginners’ mind and wonder to play with your oft-neglected feet.
Set Up:
Lie on the floor with room to roll from lying on back to sitting.
Or sit on a chair with feet flat on the floor.
Or lie on the floor with the feet “standing” on a wall or chair back; support the knees for extra comfort.
Video links:
Note: I’m posting both the morning and evening recordings. The morning session follows’s Moshe’s original script more closely. The evening session is a looser interpretation, with more emphasis on connecting fingers and toes, and balancing the work with both feet equally. Both interesting. Your choice.
Back On Our Feet - 2 - Rocking Feet, Rolling Ankles
A simple approach to discovering the ankle’s power and complexity
A variation of “The Sides of the Feet - AY 433”
This lesson can be read as a tutorial in knee protection, to learn to move the ankle without twisting the knee. It can also be read as a way to relax “fraidy-toes.” Or as an exploration of the foot’s arches. Or how the eyes direct the feet. Or how the ankles affect the alignment of the leg in the hip socket. And that’s all I’ve come up with so far…
We begin by shifting weight in the foot, breaking down what it takes to roll each foot to the outside edge, then the inside. Could be very different. There’s a Feldy fun interlude of rolling the feet side to side in coordination with the head.
Violinist Ester Abrami - source YouTube Niccolo Paganini - “Cantabile” by Esther Abrami.
Once the ankles and eyes are warmed and connected, we begin bending the knee out to the side - more and more - to feel the ankle’s relationship to the thigh, hip and torso. Having some external support for the knee is always appropriate. Remember, for the nervous system to allow learning, it has to be calm; no point bothering if you are scared or in pain.
On the surface, this lesson seems pretty simple and straightforward. It builds gradually and sequentially. Getting deeper in, though, it developmentally reveals the ankle’s amazing complexity, flexibility and support functions. Enjoy.
Set Up:
This is a supine - lying on the back - lesson. You might want to have a rolled towel or other support nearby. At points in the lesson, you may want to support the knee as it drops out to the side.
Alternatively, sit in a firm, flat-seated chair with thighs parallel to the floor. You might want a footstool to help keep the knees bent.
Read the full Post with additional descriptions and more video links
Back On Our Feet - 3 - Paint the Floor With Your Cowgirl Boots
A Sole-ful Mixed Metaphor Mashup
WNBA Chicago Sky Azura Stevens source: chicagotribune.com
This lesson is a medley of mixed metaphors, starting with Hula. Feel into the relationships between pressing with the inner and outer edges of the feet and the transmission of power into the hips and ribs. Feel the sway as you shift weight from the outer to inner edges of the feet.
Then we switch to painting - with the feet. Imagine the creamiest, most luxurious, most luminous paint. And glide, spread, smooth it over the floor with your feet. Front and back, side to side, and - of course - in circles. It's a full-body sensual experience.
Finally, think cowgirl boots and finding a new point on the foot for stepping - the front of the heel. This new balance point behind the ball of the foot and in front of the "ball of the heel" can change the way you feel your feet under you - when walking, dancing, riding, skiing, biking, etc.
Set Up:
You will need a stick-y thing like a pencil, thick knitting needle or dowel for part of the lesson.
This is a supine - lying on the back - lesson.
Alternatively, sit in a firm, flat-seated chair with thighs parallel to the floor
Back On Our Feet - 4 - Foot Combos That Swing
How many combinations of toes, heel, knee and hip can you imagine?
Variations on “Pillows and Swings (AY #380)”
Annika Sorenstam tees off on the seventh hole during the second round of the Ginn Open at Reunion Resort. Mandatory Credit: Kim Klement-USA TODAY Sports.png
The lesson is nicknamed “Pillows and Swings.” “Pillows” refers to the soft, pillowy pads of the toes and soles of the feet. “Swings” refers to the knees and hips. Put them together and you get a lesson that explores the multiple configurations of the foot and leg joints.
This lesson takes you through various relationships with gravity. Some segments are on the back (supine) with knees bent and feet pointing to the ceiling. Side-lying both right and left with the legs kicking forward and backward offer a different orientation.
Set Up:
Lying on a mat, a folded towel or firm pillow can make the side-lying parts more comfortable.
Seated on a flat-seated, armless chair. Sit facing forward or to the left or right along with the lesson. Sit on or support feet with a folded blanket or towel to make the thighs and hips level.
If legs in the air isn’t for you, lie supine with shins supported on a stool or chair and feet against a flat surface like the back of the chair, a piece of furniture or a wall.
Back On Our Feet - 5 - Tripod Feet
The Foundation for Everything
Based on “Activating the Arches” as taught by Nick Strauss Klein
This lesson gets to the core of it: the tripod of the foot, where this fundamental support sets up the whole system.
It touches all the “Back On Our Feet” lessons to date, starting with toes, moving on to the edges of the feet, and to that elusive ‘front of the heel’ from the mash-up "cowgirl boot” lesson. The finale integrates the feet into the entire leg system, as we touched on in the “pillows and swings’ lesson.
As it progresses, the image of ‘tapping a button with the outside ankle’ is a guide to shifting weight across the foot without rolling the knee. This is important for protecting knees from the twisting they were never designed to accommodate. The outside ankle, however, allows for movement and support of the knee; that outside ankle know is actually the bottom of the thin fibula bone, which does allow for twisting, and can play an important part in stabilizing the knee.
Ultimately, the forefoot (ball of foot and metatarsal under the ‘ring toe’) form one line of the triangle, both corners pointing to the front of the heel. This stable position allows for the foot triangle to support the whole body in both standing and walking.
This lesson is supine, lying on the back. You can also do it sitting in a chair. If “butterfly” position, seated with feet together and knees pointing outward, is difficult for you, think about doing the lesson, or at least that part of the lesson, in a chair.
Back On Our Feet - 6 - Plant Foot to Stand
From Foot to Spine to Standing
Based on “Sit to Stand With Feet“ as taught by Alan Questel GCFT®
Test the theory that the configurations of foot and spine correlate. “Floor It To Stand” is a sitting-on-a-stool-to-standing exploration of the biomechanics of elegantly rising from a chair.
Begin in sitting. Feeling into and loosen the spine and foot with an easy rocking on the sit bones. How does the pelvis relate to the heel?
Then reverse the motion by arching the back and note how the feet respond. There are deeper twists of the arched back and an invitation to shift the center of gravity way forward.
At the transitions between steps, test your biomechanics by standing. And, at each junction, see what it’s like to increasingly open the ankle to fully sense how the center of gravity shifts over the foot as you stand with an ever-elongating back.
Set Up:
Seated on a flat-seated, armless chair. Sit on or support feet with a folded blanket or towel to make the thighs and hips level.
Back On Our Feet - 7 - Plant Feet to Twist
From Foot to Spine to Ribs to Turn
Based on “The Coachman” by Gaby Yaron
When you engage the pelvis and the entire length of the spine - with a turn of the ribs - you get a really good, full field-of-vision look behind.
This lesson begins with the feet ‘rocking the rocking chair’ of the sit bones to release, align and elongate the spine. A press of the foot lifts one side of the pelvis allowing the entire torso and head to twist. A little support of the exhale and pelvic floor, a bit more relaxation in the ribs, and the twist gets even twistier. The opposite ribs come together. The same side ribs expand to create length in the spine, and space for the head to turn in the opposite direction.
There are optional rests in walking and standing. At the end, we may get down on hands and knees to relive that moment when crawling became a possibility.
Same move in a different orientation: hip and shoulder come together and looking over the shoulder is easy!


